Transforming something irregular into the gun is any Guardian’s job and hobby. The Parasite is a unique exotic grenade launcher that uses Hive worms as projectiles. It may not be everyone’s favorite because of the aesthetic but it’s still a fun weapon to fire at least once. To equip you with this menace here’s the guide on how to get the Parasite in Destiny 2.
Parasite Exotic Grenade Launcher
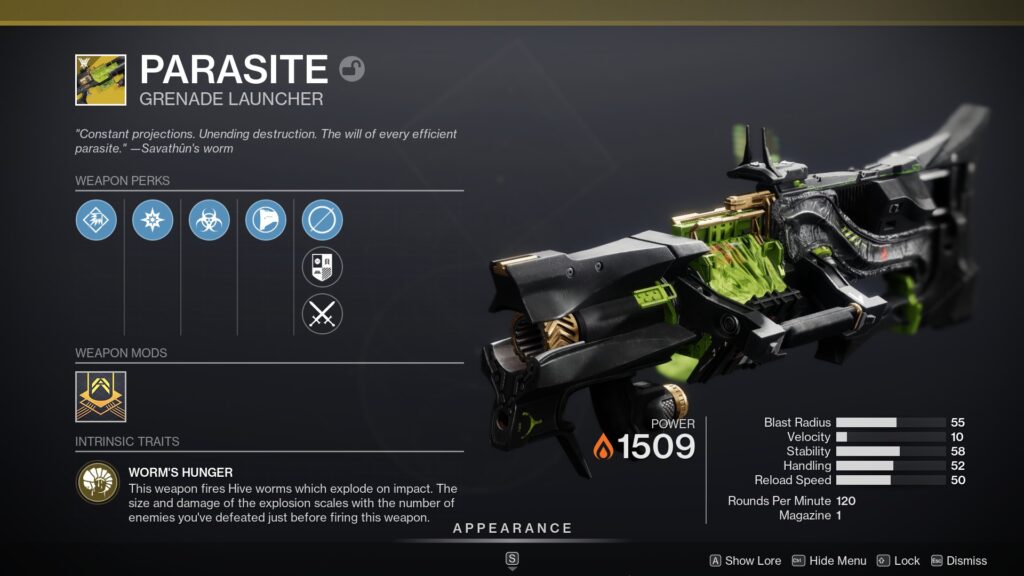
The Parasite is another quite unique gun in Destiny 2 when it comes to both design and functionality. Its main trait is Worm’s Hunger: the weapon fires Hive worms instead of grenades that explode on impact. The size and damage of the explosion scale with the number of enemies you’ve defeated before firing a worm.
So as you can see it’s pretty unique. A few things to note is that the launcher has one projectile magazine, meaning reloading after every shot. And the projectiles fly lower compared to regular grenade launchers. Worms are heavy.
Other perks in this weapon apart from launching worms are:
- Volatile Launch: Greatly increases blast radius at the cost of a bit of handling and projectile speed
- High-Explosive Ordnance: Increases blast radius at the cost of a bit of projectile speed and magazine size
- Worm Byproduct: Taking damage from your own worm projectile empowers your weapons for a short time
- Composite Stock: Slightly increases stability and handling speed
How to Get the Parasite Exotic Quest?
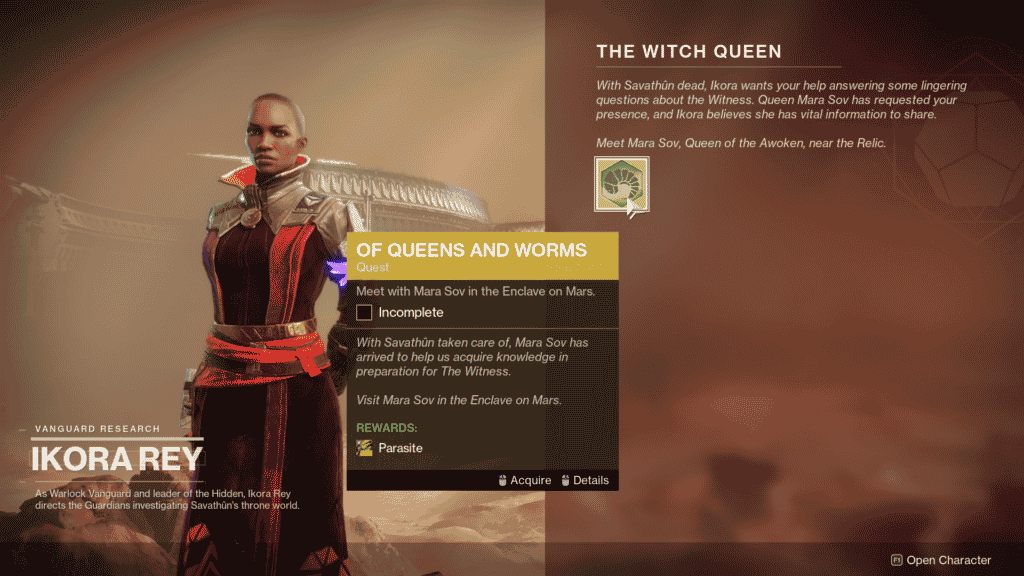
The quest is given to us at the finale of The Witch Queen campaign. After a debrief dialogue with Ikora Rey she will give you the quest saying that Mara Sov arrived on Mars and she requires assistance. This is when the Of Queens and Worms exotic quest begins.
All the steps in the quest are pretty self-explanatory. All the objectives will be highlighted by markers on your HUD so there’s nothing to worry about. Below there is a description of the Lost Sectors that you will need to clear during this quest. There are descriptions of the entrances to each one and locations of quest items.
Of Queens and Worms Quest Steps
- Meet with Mara Sov in the Enclave on Mars
- Complete the “Birthplace of the Vile” strike
- Visit Fynch
- Locate a Cryptoglyph rune in the Temple of Cunning
- Defeat Scorn in the Throne World (100)
- Find the entrance to the Sepulcher Lost Sector in the Florescent Canal
- Locate a larvae incubator at the end of the Lost Sector
- Complete three patrols in the Florescent Canal
- Locate a Cryptoglyph rune in the Queen’s Bailey
- Find the entrance to the Metamorphis Lost Sector in Miasma
- Locate a larvae incubator at the end of the Lost Sector
- Locate a Cryptoglyph rune in the Alluring Curtain
- Find the nearby Deepsight cache in the Alluring Curtain (Reveal the platforms and light three torches by shooting at them)
- Find the entrance to the Extraction Lost Sector in Quagmire
- Locate a larvae incubator at the end of the Lost Sector
- Visit Fynch
- Complete the “Paratistic Pilgrimage” mission (recommended Power Level is 1520)
The whole quest tells an interesting story about interacting with a Hive worm and their intentions. It’s not every day you get to speak to one of them. The worm will also reveal some information about Savathûn’s connection to the Witness. And at the end of the Paratistic Pilgrimage, you will receive the exotic grenade launcher Parasite, continuing Destiny 2 traditions of transforming gods into guns.
Sepulcher Lost Sector
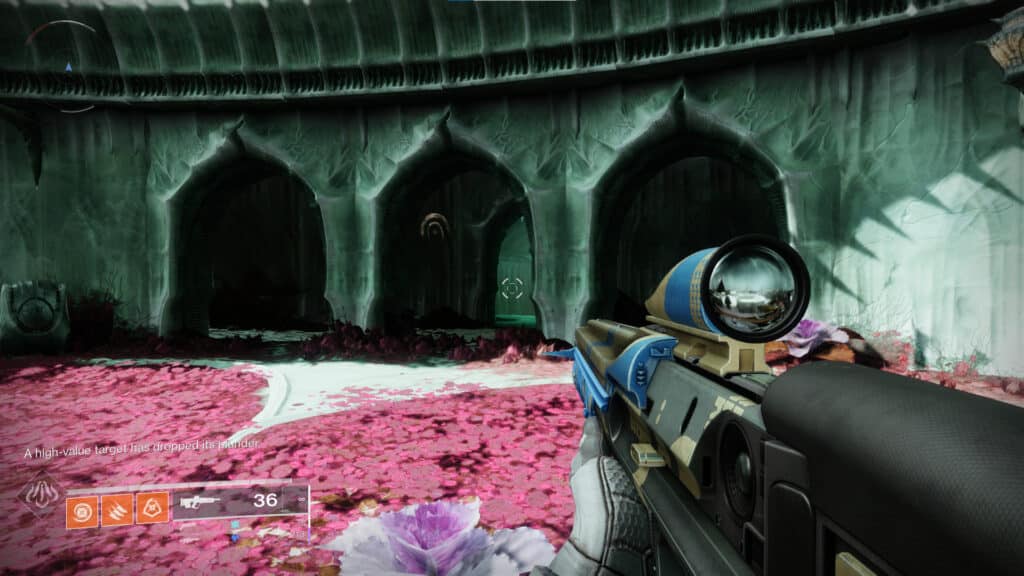
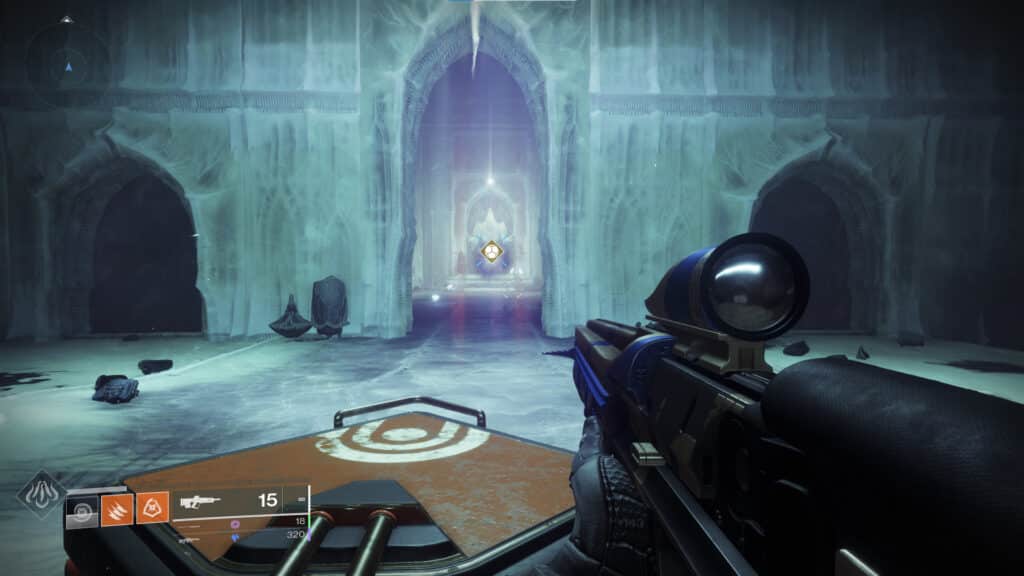
The entrance to the Sepulcher Lost Sector lies by the big statue that you will see once at the marker. It can’t be hard to notice it at different angles so make sure to go through the arched paths by the statue to locate the entrance.
After clearing the lost sector don’t head straight out. If you go too far away you will reach a point of no return without grabbing the quest item and will have to clear the Lost Sector again.
After the final fight, a Deepsight will appear in the middle of the room with the chest. Guardians may miss it if they ended up fighting on the side closer to the door as the marker doesn’t highlight the Deepsight. Use the Deepsight to reveal a path above the thrall’s head behind the chest. The path will lead you to the incubator required for the quest.

Metamorphis Lost Sector
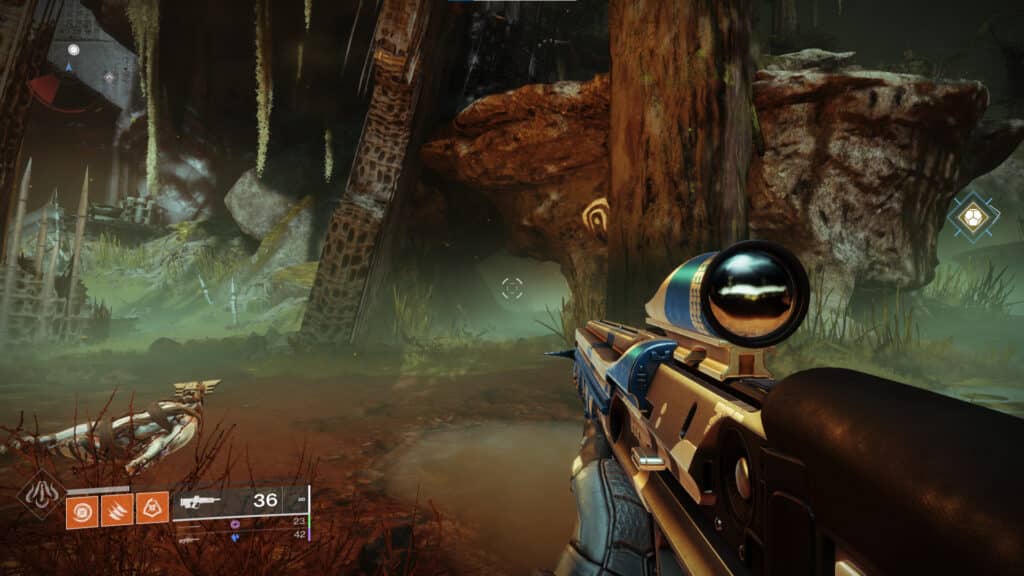
This lost sector is located in the Miasma region and is quite easy to find. In the middle of the region, there will be a big grey tower. On the left of it (if you came from the south, which you probably did) there will be a collapsed wall with a hole in it. By that hole on the right side, you will find an entrance to the Metamorphis Lost Sector.
After looting the Lost Sector’s chest try not to accidentally jump into the cannon on the left as it will take you out to the surface. Instead, go past and use the Deepsight to remove the stone blocking the wall. Proceed through the gateway and there you will find the incubator.

Extraction Lost Sector
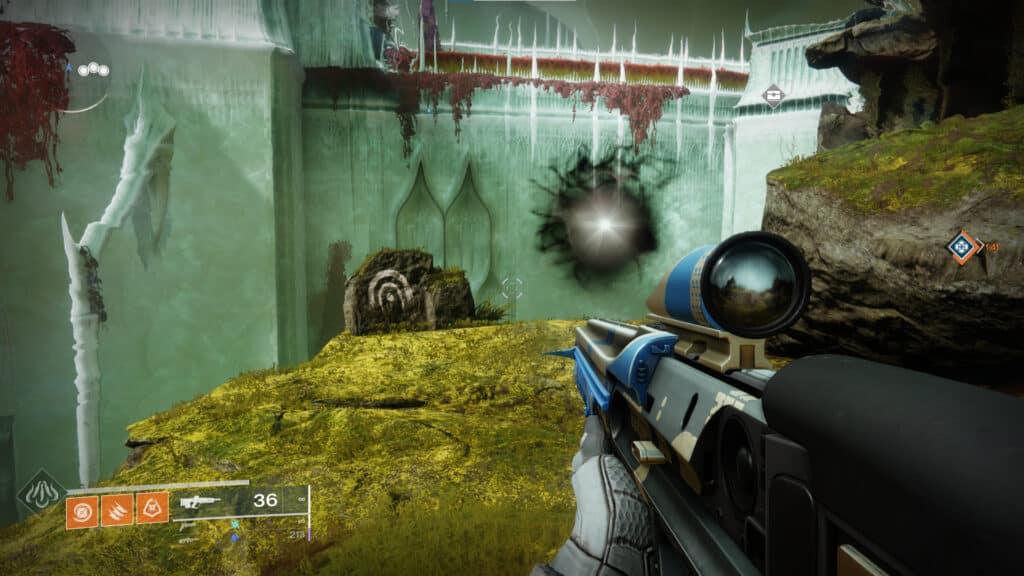
Entrance to the Extraction Sector is hidden by the Deepsight. On the edge of the cliff, you will find a rock with the Lost Sector symbol and the Deepsight cloud nearby. Deepsight will reveal the rock platforms below for you to come down to the caves. But in fact, you can reach the entrance without even using Deepsight, it is there to guide you.
In the Lost Sector, you will find a gate locked with three seals. The game will not tell you but you have to capture three round platforms around the area by standing on them for a while and then the seals will be lifted. The looting and accessing the incubator is straightforward in the Extraction. Just follow the markers and you won’t miss it.